Windows 11 Slowing/Freezing Games
The Problem: Windows 11 25H2 and Intel's Newest Architecture Don't Play Nice
After updating to Windows 11 25H2, my gaming experience went from flawless to absolutely unplayable. Games that previously ran butter-smooth started freezing every few seconds, stuttering constantly, and making me question my sanity.
The scenario
Basically, I have a system designed for Big Data, Data Science in general. I upgraded my system processor in January 2025 to an Intel Core Ultra 9 285, and I updated my Windows 11 24H2 to 25H1. Everything was working fine as a workstation and for gaming, until I decided to update to Windows 11 25H2 and I started noticing issues with my games.
My System Specs
| Component | Specification |
|---|---|
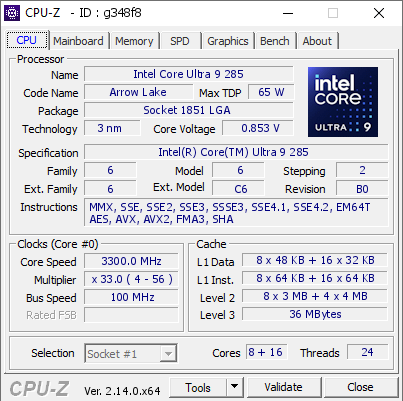
| CPU | Intel Core Ultra 9 285 |
| RAM | 128GB |
| GPU | NVIDIA RTX 3060 Ti |
| Storage | NVMe SSD (2280 MB/s) |
| OS | Windows 11 Pro 25H2 |
What I Ruled Out First
Before diving into the rabbit hole of fixes, I systematically eliminated the obvious suspects:
- ✅ OS Corruption : Clean, verified installation
- ✅ Disk Corruption : SMART status healthy, no errors
- ✅ Game File Corruption : Verified integrity through Steam multiple times
- ✅ Hardware Failure : All components tested and working perfectly
The Interesting Discovery: It's Not Just Me... Sort Of
Here's where things got interesting. I have other systems at home, and after the same Windows 11 25H2 update:
| Processor | Gaming After 25H2 Update |
|---|---|
| Intel Core Ultra 9 285 | ❌ Completely broken with constant freezes and stutters |
| Intel Core i5-10400F | ✅ Works fine Except for Hogwarts Legacy |
| Intel Core i7-10700K | ✅ Works fine Except for Hogwarts Legacy |
This pointed me toward something specific to Intel's newer hybrid architecture with E-cores (Efficiency cores) and P-cores (Performance cores). The older 10th-gen processors don't have this hybrid design, and they work perfectly fine.
Note: This investigation was limited strictly to gaming performance. I didn't evaluate other workloads like video encoding. I typically use Intel QSV (Quick Sync Video) for encoding rather than GPU-based NVENC, so I can't speak to whether those scenarios are affected.
The Fixes That Actually Worked
After countless hours of research, forum diving, and trial-and-error, I found three key fixes that brought my system back to life. Here's exactly what I did for each game and scenario.
Fix #1: Disable Microsoft Device Association Root Enumerator (Elden Ring)
Game: Elden Ring
Symptom: Game freezing every 10-30 seconds for 1-4 seconds, then speeding up to "catch up"
What Is This Thing?
The Microsoft Device Association Root Enumerator is a Windows component that assigns values to devices when new drivers try to install software. It's related to device discovery and enumeration essentially, Windows constantly checking what's connected to your PC.
The problem? Elden Ring is notoriously sensitive to this. Every time Windows performs a device enumeration check, the game freezes. You can actually watch Device Manager refresh in sync with the stutters if you have it open while playing.
How to Disable It
- Press
Win + Xand select Device Manager - Scroll down and expand Software devices
- Find Microsoft Device Association Root Enumerator
- Right-click and select Disable device
- Click Yes to confirm
- Restart your PC
Important Notes
- Do NOT uninstall only disable. You can re-enable it anytime.
- This may affect MIDI devices and TWAIN scanners (document scanners). If you use these, you'll need to re-enable the enumerator when needed.
- For most users, there are zero negative side effects.
Result for Elden Ring
Before: Unplayable. Freezing every 6-8 seconds. On bosses + Multiplayer it was completly freezed and after the boss erase me from the existence the game show a black screen and after one minute the game respond to my keyboard and mouse inputs (Yes, I don't use a controller).
After: Smooth 60 FPS with occasional minor hitches in new areas (shader compilation, which is a separate known issue, Raytracing on this game is strange)
Fix #2: Use Process Lasso to Manage CPU Affinity/E-Cores (Star Citizen)
Game: Star Citizen
Symptom: Severe stuttering, frame drops, inconsistent performance despite powerful hardware
The E-Core Problem Explained
Intel's hybrid architecture (12th gen and newer, including Core Ultra) uses two types of cores:
- P-Cores (Performance): High-power cores for demanding tasks
- E-Cores (Efficiency): Lower-power cores for background tasks
The problem is that many games, including Star Citizen, don't properly understand this architecture (I believe also that they don't understand any other thing than design new fucking starships instead of ending the game). They may schedule critical game threads on E-cores, which are significantly slower than P-cores. This causes massive stuttering and performance inconsistencies.
Windows 11 is supposed to handle this with its Thread Director technology, but clearly something broke in 25H2 at least for the Core Ultra 9 285.
The Solution: Process Lasso
Process Lasso is a process management tool that lets you control CPU affinity (which cores a program can use) and other performance settings. It's a paid tool, but it's well worth it for this kind of scenario. I used a few years ago (Before 2020) when I had a crappy laptop and it was a lifesaver.
Step-by-Step Setup
-
Download and Install Process Lasso
- Get it from https://bitsum.com/
- The free version works, but CPU Sets (a more elegant solution) requires the paid version
-
Launch Star Citizen
-
Open Process Lasso and find the Star Citizen process
-
Set CPU Affinity
- Right-click on the Star Citizen executable
- Go to CPU Affinity → Always → Select CPU Affinity
- Uncheck all E-cores (these are typically the higher-numbered cores)
- For the Core Ultra 9 285, you want to keep only P-cores active
- Click OK
-
Alternative Method: Exclude Core 0
- Some users report that simply excluding CPU 0 (and sometimes 0, 1, 2, 3) provides significant improvement, at least that's what they recommended for Elden Ring Steam Community
- This prevents thread contention issues between the game and other processes that checks stuff in the game like a AntiCheat Software.
For Online Play (Important!)
Easy Anti-Cheat (EAC) blocks traditional CPU affinity changes in many games. Process Lasso's CPU Sets feature (paid) works around this:
- CPU Sets are "softer" guidelines that EAC doesn't interfere with
- The OS has flexibility but generally follows your preferences
- You get approximately 90% of the performance benefit while keeping online functionality
My Process Lasso Configuration for Star Citizen
Process: StarCitizen.exe
CPU Affinity: P-Cores only
Priority: High
Power Profile: Bitsum Highest Performance
Result for Star Citizen
Before: Stuttering mess, FPS all 20-30, frequent micro-freezes
After: Consistent frame times closing 52-55, smooth gameplay, noticeable FPS improvement
Fix #3: Disable Problematic Windows Services
Affects: All games, system-wide improvement
Services to Disable
Two Windows services have been identified as contributing to gaming stutters, particularly on systems with the issues I was experiencing.
1. SSDP Discovery Service
This service discovers networked devices and services that use the SSDP discovery protocol. It's constantly scanning your network, which can cause micro-stutters.
To Disable:
- Press
Win + R, typeservices.msc, press Enter - Find SSDP Discovery
- Double-click to open properties
- Set Startup type to Disabled
- Click Stop if the service is running
- Click Apply and OK
2. Xbox Services (All of Them)
Even if you don't use Xbox features, these services run in the background and can interfere with games, particularly those running through Steam.
Services to Disable:
- Xbox Accessory Management Service
- Xbox Live Auth Manager
- Xbox Live Game Save
- Xbox Live Networking Service
- GameInput Service (related)
To Disable Each:
- Press
Win + R, typeservices.msc, press Enter - Find each Xbox-related service
- Double-click to open properties
- Set Startup type to Disabled
- Click Stop if running
- Click Apply and OK
- Repeat for all Xbox services
Quick PowerShell Method (Run as Administrator)
# Disable SSDP Discovery
Set-Service -Name "SSDPSRV" -StartupType Disabled
Stop-Service -Name "SSDPSRV" -Force

# Disable Xbox Services
Set-Service -Name "XblAuthManager" -StartupType Disabled
Set-Service -Name "XblGameSave" -StartupType Disabled
Set-Service -Name "XboxNetApiSvc" -StartupType Disabled
Set-Service -Name "XboxGipSvc" -StartupType Disabled

# Stop all Xbox services
Get-Service -Name "Xbl*" | Stop-Service -Force
Get-Service -Name "Xbox*" | Stop-Service -Force
Result
Before: Random micro-stutters across all games
After: Noticeably smoother overall gaming experience
Summary: The Complete Fix Checklist
Take in mind that I tried all of these solutions and they didn't resolve my issue alone, only when i combined them it worked. So basically it was a mix of all of them.
For Elden Ring Specifically + System-Wide
- Disabled Microsoft Device Association Root Enumerator in Device Manager
For Star Citizen Specifically + System-Wide
- Installed Process Lasso
- Configured CPU affinity to exclude E-cores
- Set process priority to High
System-Wide
- Disabled SSDP Discovery service
- Disabled all Xbox-related services
- Disabled GameInput service
Additional Recommendations
While the three fixes above solved my main issues, here are some additional tweaks that can help. I try all of them, but they didn't resolve my issue, but I still believing that they are worth to mention if in your case the previous solutions don't work:
NVIDIA Users
- Set Shader Cache Size to Unlimited in NVIDIA Control Panel
- Consider using Borderless Windowed mode instead of Fullscreen
- Disable Hardware-accelerated GPU scheduling in Windows Display settings
Power Settings
- Use the Ultimate Performance power plan:
powercfg -duplicatescheme e9a42b02-d5df-448d-aa00-03f14749eb61
USB Devices
I read on reddit that some users have a headset or peripherals that cause the issue (Damaged USB cables)
- Unplug unnecessary USB devices while gaming
- Disable USB Selective Suspend in Power Options